Achieve Perfect Twix Thumbprint Cookies: Pro Tips for Caramel & Crunch
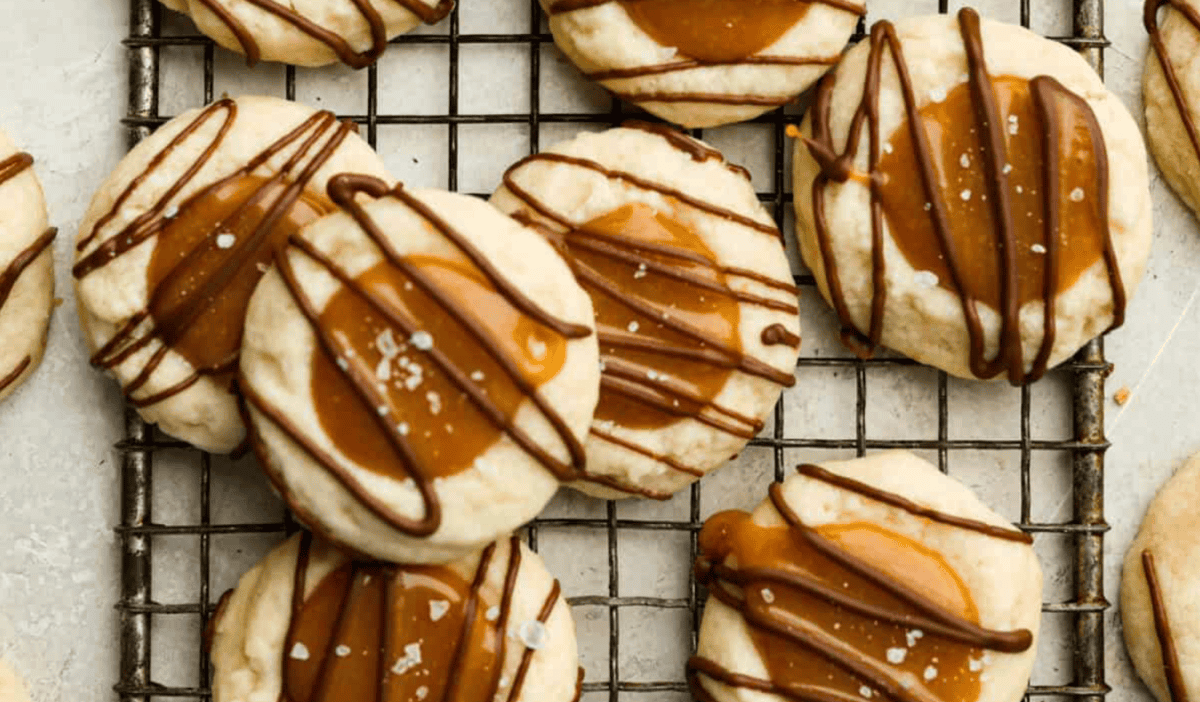
Imagine sinking your teeth into a buttery, crumbly shortbread cookie, followed by a luscious, chewy caramel center, all crowned with a delicate ribbon of rich chocolate. That’s the magic of Twix Thumbprint Cookies – a delightful homemade rendition of a beloved candy bar, transformed into an irresistible bite-sized treat. For many home bakers, the journey to mastering these cookies is an exciting quest, filled with the aroma of melting butter and the sweet satisfaction of getting that perfect balance of textures. Whether you're a seasoned baker or just starting, our comprehensive guide will equip you with the insights and pro tips needed to create Twix Thumbprint Cookies that are truly exceptional, boasting ideal caramel chewiness and a satisfying shortbread crunch.
Why These Cookies Will Become Your New Obsession
These aren't just any cookies; they're an experience designed to evoke nostalgia and delight with every bite. Here's why you'll want to add Twix Thumbprint Cookies to your baking repertoire:
- Silky-Smooth Shortbread with Crisp Edges: We'll guide you to achieve a tender, melt-in-your-mouth shortbread base that still offers a satisfying crispness around the edges, forming the perfect foundation for your caramel and chocolate layers.
- Gooey Caramel Pools That Stay Put: Say goodbye to runny, overflowing caramel. Our techniques ensure your caramel filling is perfectly thick, chewy, and contained within its thumbprint well, delivering that signature gooey texture without the mess.
- Glossy Chocolate Ribbons That Set Firm: Learn the secret to achieving a beautiful, shiny chocolate drizzle that sets perfectly without cracking, adding an elegant finish and an extra layer of chocolatey goodness.
- A Playful Nod to Candy Bar Heritage: Recreate the iconic flavors of a Twix bar in a charming, homemade format. It’s a sophisticated twist on a classic candy, perfect for sharing or savoring solo.
From the cozy kitchen experiments of adapting old candy-bar recipes to the sweet satisfaction of perfecting each element, these
Master Twix Thumbprint Cookies: Gooey Caramel & Crisp Shortbread are a testament to the joy of homemade treats.
The Anatomy of a Perfect Twix Thumbprint Cookie: Key Ingredients & Their Roles
Crafting the ideal Twix Thumbprint Cookie starts with understanding the contribution of each ingredient. Quality ingredients, properly handled, are your secret weapon.
- Unsalted Butter (1 cup): The cornerstone of our shortbread, butter provides richness and tenderness. Ensure it's softened to room temperature for optimal creaming, but not melted, as this can affect dough consistency and spread.
- Granulated Sugar (½ cup): Contributes sweetness and helps achieve those coveted crisp, golden edges in the shortbread.
- Light Brown Sugar (¼ cup): Adds a deeper, more complex sweetness with subtle molasses notes, as well as crucial moisture, resulting in a slightly chewier, more tender crumb.
- All-Purpose Flour (2½ cups): Forms the structural base of the cookie. Accurate measurement is critical – spoon and level your flour to avoid a dry, tough cookie.
- Large Egg Yolks (2): While not always present in traditional shortbread, egg yolks elevate these thumbprints, adding extra richness, color, and contributing to a wonderfully tender texture without making the dough cakey.
- Vanilla Extract (1 teaspoon): Enhances all the other flavors, adding a warm, aromatic depth to the shortbread.
- Soft Caramel Candies (14 pieces): The heart of your cookie! Choosing soft, high-quality caramels (like Kraft or Werther's soft caramels) is paramount for a smooth, gooey, and easily manageable filling. Coupled with a touch of heavy cream, they melt into a luxurious pool.
- Semisweet Chocolate Chips (1 cup): For that signature chocolate drizzle. Semisweet offers a balanced sweetness that complements the rich caramel and buttery shortbread.
- Vegetable Oil (2 teaspoons): A small but mighty addition to your melted chocolate, ensuring a smooth, glossy drizzle that sets beautifully without cracking. Coconut oil can also be used for a similar effect, adding a subtle flavor nuance.
Crafting Your Masterpiece: A Step-by-Step Guide to Twix Thumbprint Cookies
Follow these steps diligently, paying attention to the nuances, and you'll be rewarded with a batch of exquisite Twix Thumbprint Cookies.
- Preparation is Key: Preheat your oven to 350°F (175°C) and line two baking sheets with parchment paper. This prevents sticking and aids in even baking.
- Cream the Foundation: In a large mixing bowl, combine the softened unsalted butter, granulated sugar, and light brown sugar. Beat with an electric mixer on medium-high speed for about 3 minutes until the mixture is light, fluffy, and pale. This incorporates air, which is vital for a tender cookie.
- Enrich the Dough: Add the two large egg yolks and vanilla extract. Mix on low speed until *just* combined. Overmixing at this stage can lead to a tougher cookie.
- Incorporate Dry Ingredients: Gradually add the all-purpose flour and ¼ teaspoon of salt to the butter mixture. Mix on low speed until a soft, cohesive dough forms. Stop mixing as soon as the last streaks of flour disappear to prevent gluten development.
- Roll and Chill (Optional, but Recommended): Roll the dough into 1-inch balls (approximately 1 tablespoon each). Place them about 2 inches apart on your prepared baking sheets. For crisper outlines and less spreading, consider chilling the formed dough balls for 15-20 minutes before baking. This extra step truly makes a difference in texture and appearance.
- Bake to Perfection: Bake for 12 minutes, or until the edges are lightly set and just barely golden, but the centers still appear pale. Overbaking will result in a dry cookie.
- Create the Thumbprint: Immediately upon removing from the oven, gently press the center of each warm cookie with a clean thumb or the back of a ½ teaspoon measuring spoon to create a well. If the cookies cool too much, they may crack when pressed. Let the cookies cool on the baking sheet for 5 minutes.
- Melt the Caramel Magic: While cookies cool, unwrap 14 soft caramel candies and place them in a microwave-safe bowl with 2 tablespoons of heavy cream. Microwave in 30-second bursts, stirring well after each interval, until the caramel is smooth, melted, and lump-free.
- Fill and Firm: Spoon about 1 teaspoon of the warm, melted caramel into each indentation. Be careful not to overfill. Transfer the baking sheets to the refrigerator and chill for at least 10 minutes to allow the caramel to firm up slightly.
- Drizzle the Chocolate: In a separate microwave-safe bowl, combine the 1 cup of semisweet chocolate chips and 2 teaspoons of vegetable oil. Microwave in 15-second intervals, stirring after each, until the chocolate is fully melted and glossy.
- Final Flourish: Using a spoon, fork, or a small piping bag (snip a tiny corner off a Ziploc bag for precision), drizzle the melted chocolate over the cooled, caramel-filled cookies.
- Set and Enjoy: Allow the chocolate to set at room temperature or, for a quicker set, chill the cookies in the refrigerator for 15 minutes. Once set, these Homemade Twix Thumbprint Cookies: Perfect Caramel & Glossy Chocolate are ready to be savored!
Pro Tips & Troubleshooting for Ultimate Caramel & Crunch
Achieving perfection often lies in the details. Here are some advanced tips and solutions to common challenges:
The Dough Whisperer: Mastering Your Shortbread
- Chilling is Your Friend: Beyond just the pre-bake chill, if your kitchen is warm or your dough feels sticky, don't hesitate to chill the dough for 30 minutes after mixing. Cold dough is easier to handle, spreads less in the oven, and yields a crisper texture.
- Don't Overmix: Overmixing flour develops gluten, leading to tough cookies. Mix only until the ingredients are just combined.
- Accurate Flour Measurement: Always spoon your flour into the measuring cup and level it with a straight edge. Scooping directly can pack in too much flour, drying out your dough.
- Uniform Balls for Even Baking: Use a cookie scoop or kitchen scale to ensure your dough balls are uniform in size. This guarantees even baking and consistent thumbprint size.
Caramel Connoisseur: Perfecting the Gooey Center
- Caramel Quality Matters: Opt for soft, pliable caramels. Harder caramels may not melt as smoothly and can result in a chewier, less desirable texture.
- Preventing Spills: Don't be tempted to overfill the thumbprint. A good rule of thumb is to fill just below the rim of the well. The caramel will settle slightly as it cools.
- A Pinch of Salt: For a gourmet touch, stir a tiny pinch of sea salt into your melted caramel. This elevates the flavor, creating a delicious salted caramel effect that perfectly balances the sweetness.
- Consistency Check: If your melted caramel seems too thick, add another ½ teaspoon of heavy cream and stir until desired consistency is reached. If it's too thin, let it cool for a few minutes to thicken slightly.
Chocolate Artistry: Achieving a Flawless Finish
- Oil for Shine and Flow: The vegetable oil isn't just for gloss; it also thins the chocolate slightly, making it easier to drizzle smoothly without clumping. Coconut oil can also be used, lending a subtle tropical note.
- Drizzling Techniques: For fine lines, use a fork, dipping it into the chocolate and letting excess drip off before quickly flicking it over the cookies. For more controlled ribbons, a small piping bag with a tiny snipped corner works wonders.
- Setting the Chocolate: While refrigerating helps chocolate set faster, sometimes rapid cooling can dull the shine. For the glossiest finish, let the chocolate set at room temperature if time permits.
Troubleshooting Common Pitfalls:
- Cookies Spreading Too Much:
- Solution: Ensure your butter isn't too warm/melted. Chill the dough balls for at least 15-20 minutes before baking. Ensure you're measuring flour accurately.
- Caramel Becoming Hard or Sticky:
- Solution: You might have overcooked the caramel or not added enough heavy cream. Next time, melt slowly and use the recommended amount of cream. If it's already hard, you can gently reheat the filled cookies in the microwave for 5-10 seconds to soften the caramel.
- Chocolate Cracking After Setting:
- Solution: This often happens if the chocolate layer is too thick or if the cookies cool too rapidly. Try a thinner drizzle and allow cookies to set at room temperature if possible.
- Hollow Centers/Cracked Cookies After Pressing:
- Solution: Press your thumb or spoon gently and immediately after removing from the oven while the cookies are still hot and pliable. If the dough balls aren't evenly rolled, some might have thinner spots prone to cracking.
Conclusion
Creating Twix Thumbprint Cookies is a delightful journey that blends the art of baking with the joy of indulging in nostalgic flavors. By paying close attention to ingredient quality, mastering the dough, perfecting your caramel technique, and executing a beautiful chocolate finish, you can achieve cookies that are not only visually stunning but also explode with a symphony of textures and tastes. These pro tips and detailed steps empower you to move beyond just following a recipe, helping you understand the "why" behind each action. So, gather your ingredients, preheat your oven, and prepare to impress your friends and family (or simply yourself!) with these truly perfect caramel and crunch masterpieces. Happy baking!